Archive for November, 2013

OK here is another question i have heard time and time again in the various forums and facebook groups i am in.

What kind of filler should i use?

let me remind you that these are my opinions only, many different builders have had success with different types of fillers but for reasons that are my own, i like what works for me.

first lets take a look at what we are trying to accomplish.

filler is generally used to :

  1. fill sink marks
  2. smooth joined edges so seams do not show
  3. mold in panel lines or other custom bodywork
  4. correct either damage or inaccuracies in the kit you are working on

the types of filler available can be broken down into 3 categories

  1. hobby directed products
  2. home made alternatives
  3. automotive directed products

Either can be broken into two main categories:

  1. evaporative- dries by evaporation of solvents embedded within the filler itself
  2. chemical- hardens by the use of a chemical reaction from the introduction of the “hardener” to the filler.

first we can take a look at some of the hobby directed products out there

GreenPutty_wm tamiyabasic tamiyapolyputty

testorsputty

WhitePutty


group in there any of the other name brands on the market, i will explain a bit later why i avoid all but one of these products and dont let them touch my builds.

next i will cover 2 of the home spun fillers i have either used myself or seen others use with different grades of success.

  1. super glue with a filler
  2. styrene melted in liquid cement

and lastly i will go over some of the many fillers available for the automotive world

  1. body filler
  2. spot putty
  3. glazing putty

Now on to explain a bit of why i dont use hobby oriented fillers.

  1. shrinkage
  2. cost
  3. effect on finish

Shrinkage: because all but the 2 part tamiya putty are whats know as evaporative fillers, meaning that they harden as the solvents evaporate into the air, they shrink. some worse than others but they all do it. as the solvent evaporates from the filler itself it looses internal volume and (for lack of a better term) puckers on itself to fill the void. this can happen as quick as overnight or in the worst cases, it can be 3 months down the road when you look at a model you finished and put all that hard work into only to find out that there are cracks in the otherwise beautiful finish where the putty has shrunk and pulled itself apart.

Cost: basic price comparison. average price of a 2.5oz tube of squadron green putty – $3.75. thats $1.50 an ounce.

now a 36oz can of evercoat 2 part polyester glazing putty ( personal preference ) you can find online or in stores for just under 30 bucks. that comes down to about .77 cents an ounce.

Effect on finish: because 99% of hobby oriented fillers are solvent based, there is always the chance that the solvents are going to react (melting or warping) with the plastic itself. now you would not risk soaking your kit in a bath of lacquer thinner or mineral spirits for minutes, much less hours. so why would you allow something carrying that solvent to sit in one place on that same kit while you wait however long for it to dry?

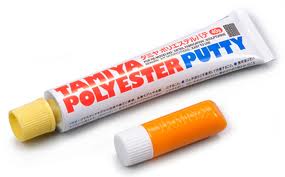
* the only one of the hobby directed fillers i would use on my own builds is the Tamiya 2 part because it is not evaporative, but i still avoid it because of the cost*


home spun fillers:

a common practice to many modelers is using superglue with or without a filler material

common practice see’s the user fill a gap with some filler medium ( baking soda, corn starch, talcum powder ) then flowing thin superglue into the gap. this is normally followed with a shot of CA glue accelerant (zip kicker). the advantage to this type of filler is that it can be sanded almost immediately so there is no waiting time before work can continue. the down side to this method is that once it cured fully ( normally in about 24 hours ) the filler becomes much harder than the plastic itself making bodywork much more difficult if you wait too long.

now i have also seen people melt styrene ( leftover sprues ) in liquid cement until they are more or less a thick liquid plastic. i tried this once before to find out the result. in my findings, this is not a very viable filler. basically this method is extremely evaporative and destructive. since the solvent is made to melt the plastic you are attempting to fill it does not make much sense to try to use it to fill gaps.


Automotive directed products:

Body Filler: brand names like Bondo are most prevalent in the market but in essence they are all the same. the only problem with general body filler in use on scale models is the coarseness of the final finish. where on a full sized car the finish would be adequate to sand prime and paint. in scale the finish is not fine enough to be viable.

Spot Putty: basically spot putty is a thinned down version of body filler which has a slightly finer finish. there are two different types of spot putty, evaporative and 2 part. avoid the evaporative type if you use spot putty as it suffers the same problems as the hobby related fillers. the 2 part spot putties are adequate for most hobby related filling situations.

Glazing Putty: think of glazing putty as an ultra fine grain body filler, an almost ideal medium for our scale. when cured with its hardener, it sands easily, feathers beautifully and offers a wonderful base for any primer and paint. this is my main filler of choice. the initial cost may seem high but if you consider that one can can last even the heaviest kitbasher well over a year it is well worth the investment.


now i have already stated at the beginning that these are my own personal opinions, you are welcomed to leave your own ideas and preferences below so others might learn from them.


this is more of a universal answer to question’s i see at the very least, a couple times a week in different forums or facebook.

the question’s are normally something like these…

i have been using a rattle can all my life and want to try an airbrush, whats the best kind?
whats better, a spray can or an air brush?
i have never used an airbrush before, should i buy the newest $200 one?

now, i am going to cover as much as i can about air brushes in this post, i will break it down into categories

Q:Why is an airbrush better than a rattle can?

A:The biggest advantage to an airbrush is the price…. yes you read that right. While you have the initial cost of investment when you first buy your airbrush, over time it easily pays for itself. Say the average hobby sized 3oz rattle can, a quick google search tells me they retail at between 4 and 6 dollars each can. when using straight from the can, a basic 2 mist coats and 2 wet coats paint job, you can expect 1 1/25- 1/25 scale coverage with a bit left over. Now, decant that same 3 oz into a bottle and shoot it through an airbrush, using the same sequence, and you will use the same amount of paint to spray 3 kits instead of 1. you just saved yourself the cost of 2 cans of paint on your first paint job. This is because that by default, the size of the tip on the rattle can is too large, allowing way more paint than needed to leave the can, the air source is also unregulated on the rattle can, this means that the more the can is used, the less the pressure propelling the paint, by using an air brush, you control both of these variables and con optimize them.
The second reason behind the cost factor is the fact that [b]you are not restricted to just hobby paints[/b] for your paint jobs any more. You can shoot any paint medium you like through the airbrush as long as it is thinned properly. one popular thing to spray through an airbrush is nail polish. nail polish is only very thick lacquer paint. if thinned properly, down to the correct consistency, it makes a long lasting, durable and brilliant model car paint. Nail polish comes in many more colors than even the most extensive line of model car paints. I buy mine from a local flea market here for $1 a bottle, i get a deal of $5 if i buy six of them at the same time. Through an airbrush , after thinning( i currently thin nail polish with medium temp lacquer reducer bought from the local car parts store ), i can shoot a whole kit with one 1/2 oz bottle of nail polish . that equates to 83 cents a paint job, try to do that with hobby paint.
Airbrushes are also great for interiors, since alot of interiors are flat, rather than glossy, one of the best things i have found to shoot them with is craft paint, currently i use apple barrel brand craft paint which i get at wallmart for 60 cents for a 2oz bottle. when shot through an airbrush, there are no brush strokes, you get a nice clean uniform finish. start with the background color, and then use a normal brush later to pick out the details.

Another advantage to an airbrush over a rattle can is control. even the most simple air brushes have controls on them to not only regulate paint flow and air pressure, but also the size of the spray pattern coming out of them. this allows you to use the airbrush in places where a rattle can is just not viable. i will use my 62 bel air as an example.

if you look at the pic above you can see a pattern in the side panel inlays, this was a detail i decided to add because it adds interest to the eye instead of just a basic one color inlay. this was done easily with a piece of paper and the air brush, you would not be able to do the same thing with a rattle can because it lacks the control of the spray pattern.

Q: which type os airbrush is best, single action or double action, also whats better, internal mix or external mix?

A: it really does not matter. i know i will take flack for this answer from some of the aficionados, but in all truth none of those make a difference in the performance or ability to lay down a stunning paint job.
Lets break them down and explain a bit further…..
By definition:
A single action airbrush delivers both paint and air at the same time when you depress the trigger
A double action airbrush delivers air when the trigger is depressed and will not start delivering paint until the trigger is pulled back.
An external mix airbrush is exactly what it says, the paint never actually travels through the airbrush itself, the siphon tip is located at the nose of the airbrush directly in the air stream. as air passes over the opening in the tip it causes a vacuum which draws the paint up from the jar into the air and then propels it onto the model.
An internal mix airbrush draws the paint into the body of the airbrush itself where it is then shot through the tip and onto the model.
Aribrushes come in four combinations single action external mix, single action internal mix, double action external mix and single action internal mix.

some example pics are below


first is a basic Badger single action external mix airbrush

next is an example of a double action generic airbrush controls

This is a flowchart on how an Internal mix airbrush works


and a Flowchart on how an external mix airbrush works

every type of airbrush is capable of laying down show quality paint. no exceptions.
there is a stipulation though… we will come to that shortly.

Q: should i go out and buy the most expensive airbrush available and expect fantastic results right out of the box?

A: in a word…. NO
some day i am going to get people to listen when i tell them that it is not the airbrush that controls the quality of a paint job, it is the person who is holding the airbrush and their ability to learn it.
let me explain,,, i can go to harbor freight and pick up one of their 15 dollar airbrushes, come home, unwrap it, load it with paint, and start spraying that kit i have been working on for weeks with bodywork getting everything just right. only to have the paint job turn out like crap. i could then blame the airbrush for being “cheap” toss it in the trash and go buy a more expensive one. get home and go through it all again only to have another bad paint job. this is the normal cycle with people new to air brushing. by the time they get to an airbrush that lays paint smooth right out of the box, its not the airbrush that made the difference, its the time they have had holding different ones in their hand which amounts to “practice”.
now if i take that same 15 dollar budget airbrush and take 2 or 3 days practicing with it, learning the air pressures it likes to work with, learning the spray patterns, and the thickness of paint it likes. Once i know that airbrush inside and out, i can lay glass smooth paint with it, bar none. i have been telling people for years that the airbrush itself does not dictate the quality of the finish, its the person that holds it with experience that can do wonders with them.
now do not get me wrong, there are reasons to upgrade to the more expensive airbrushes. the 15 dollar ones are normally constructed with cheaper parts, often times plastic bits that wear out fairly quickly. when you move up the scale a bit you find those parts are then made of metal and tend to last longer. But that is the only reason to upgrade that i can think of. it is quite possible that you can get 2 years out of that cheap one as long as it is taken care of properly.

My recommendation?

If i were just getting into airbrushing myself and had to decide on a good all around airbrush…
i would buy a testors Aztek airbrush, i have owned one before and i actually loved it, it is capable of being both single action or double action, comes with a 2 year warranty, has interchangeable tips ( fine medium and a high flow which is great for bodies when you are shooting flakes and pearls) , replacement tips are cheap and easily found, can use both color cups and paint jars, very easy to clean and maintain,they are not the cheapest out there by far, ( just found a few on ebay for the $60 range) but they are an excellent all around airbrush.
In all actuality, it will probably be my next airbrush purchase.
in a nutshell, if you are just getting into the world of airbrushing, dont “waste” your money on a top of the line airbrush costing hundreds of dollars, you can upgrade to one of them at a later point, after you learn to use one. the key to learning an airbrush is the same as with anything else… you need to have patience. i have seen many a different modeler pick up even a moderately expensive airbrush setup, only to see it a week later on ebay because it ” didnt work” for them. taking the time to learn your equipment is the biggest benefit you can give yourself.

good luck and if i can answer any questions you might have, let me know

**Update**
OK it has been a while since i wrote this so i figure i would add a bit more to it.
Couple years ago, after i wrote this article, the wife surprised me with an Aztek airbrush for Christmas. it was exactly as i remembered it and a great all around airbrush…..i now own the Aztek, an Iwata Neo, an Iwata Eclipse, a Paasche Vl and 3 other knock off airbrushes from ebay. they all work and they all do what they are supposed to do ( as long as you keep them clean )